Okta
SSO Configuration with Okta for Chaos Genius
To configure Single Sign-On (SSO) using Okta, follow these steps:
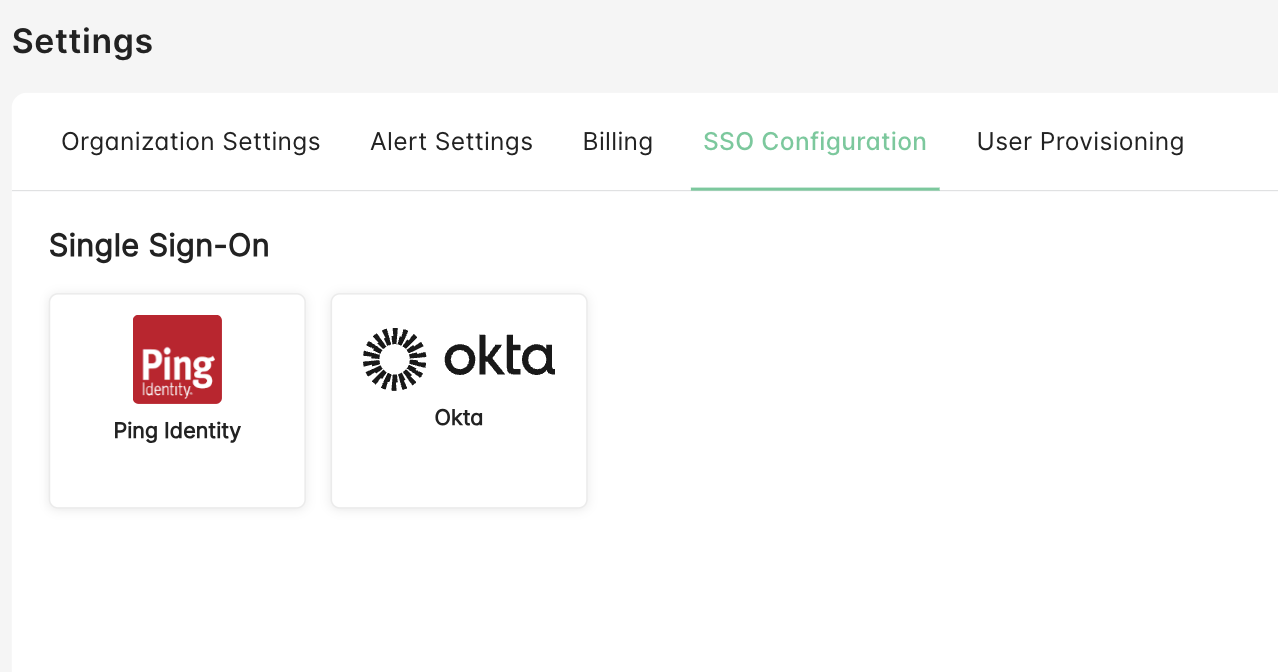
Step 1: Access the Settings Page
- Navigate to the Settings page.
- Under the SSO Configuration tab, select your Identity Provider. In this case, choose Okta.
Step 2: Add Chaos Genius as an Application in Okta
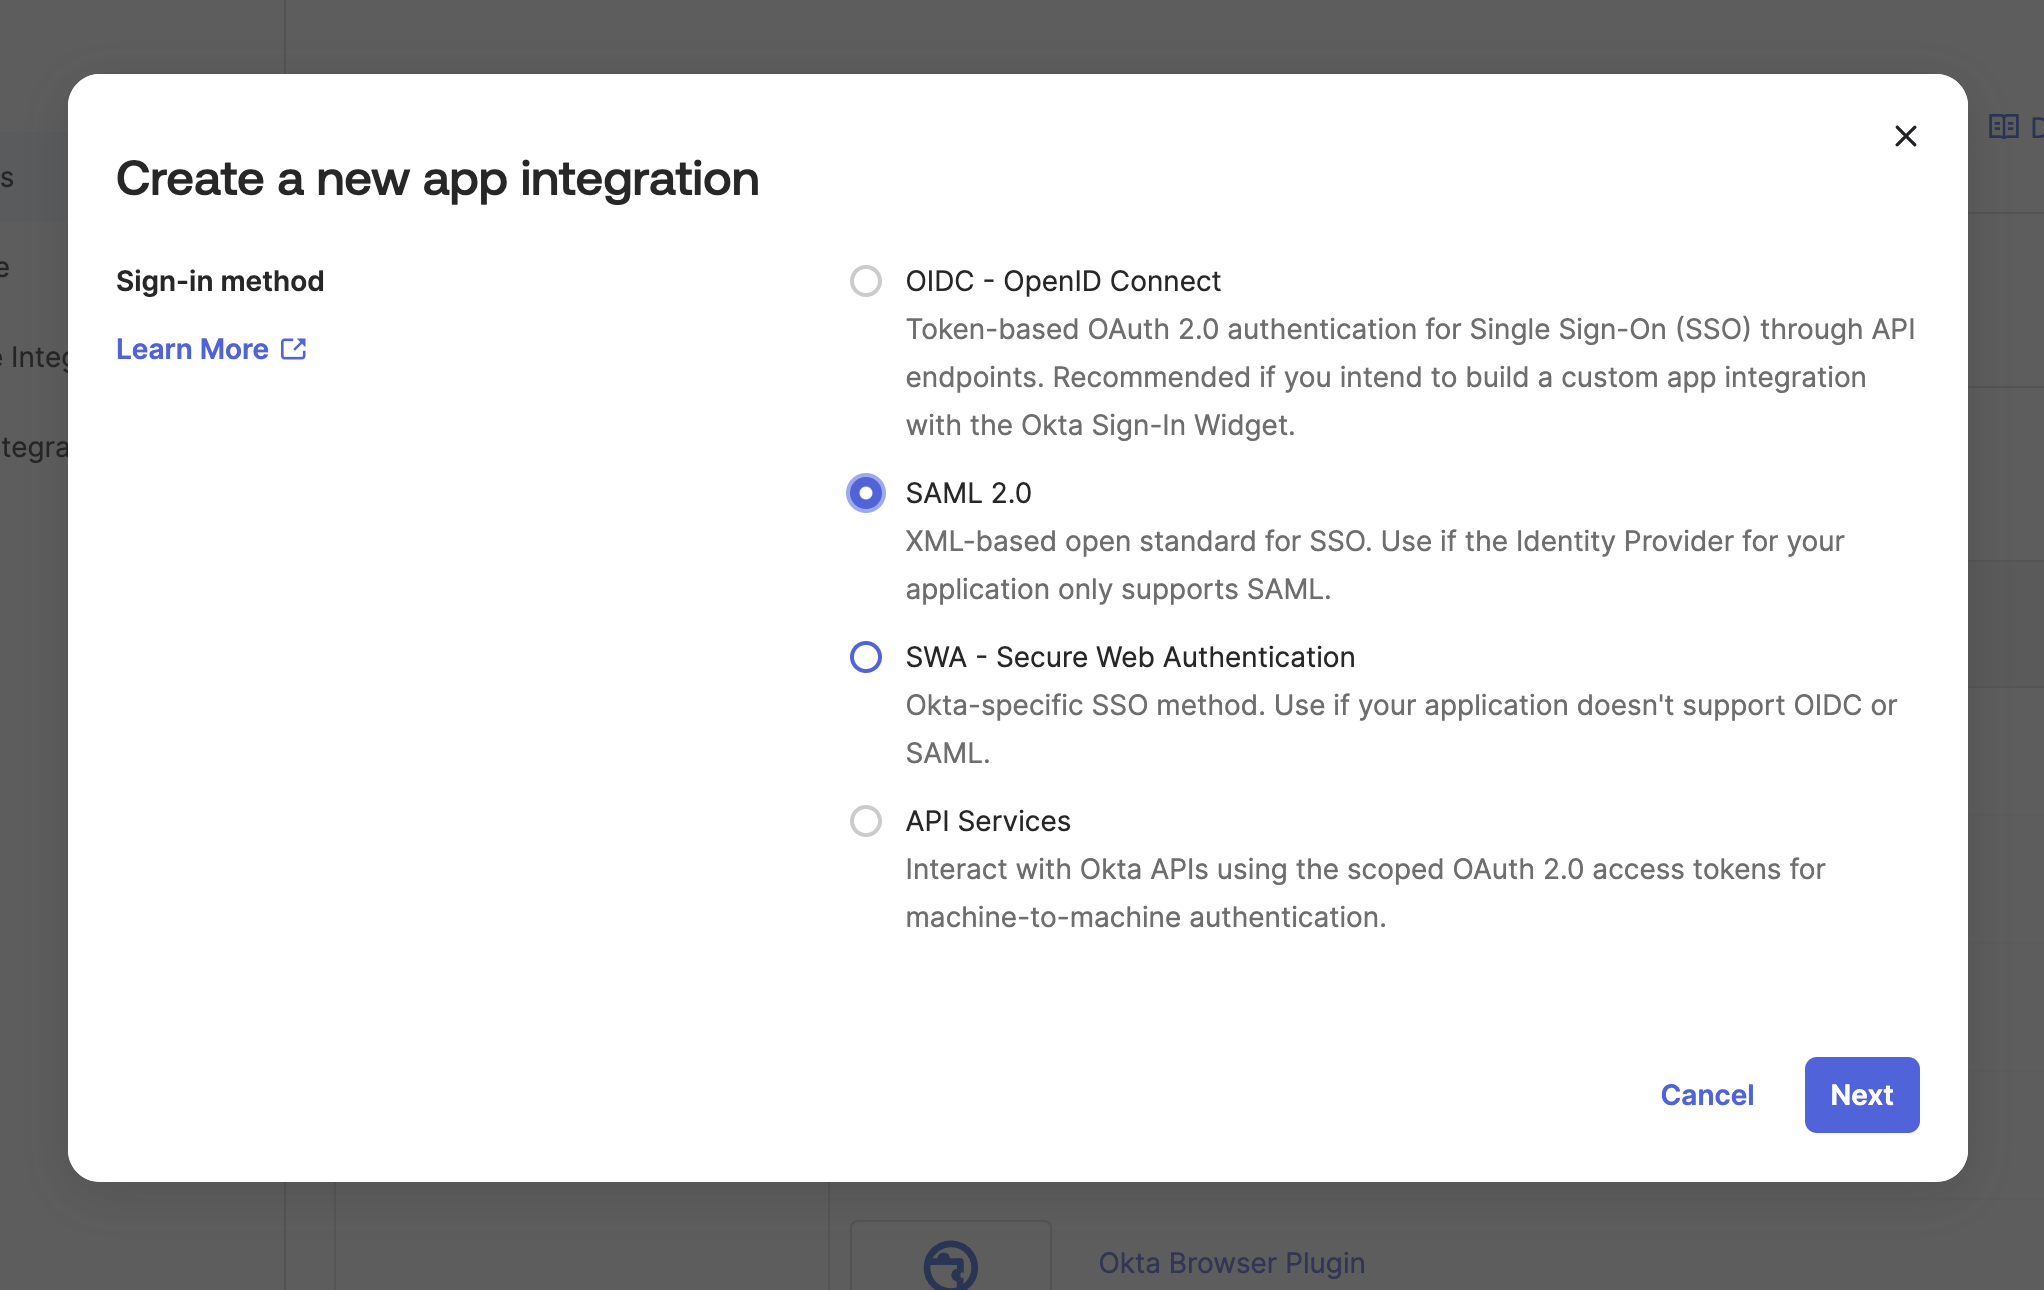
- Go to the Applications section in Okta.
- Click on the Create App Integration button on the Applications page.
- Select SAML 2.0 as the sign-in method.
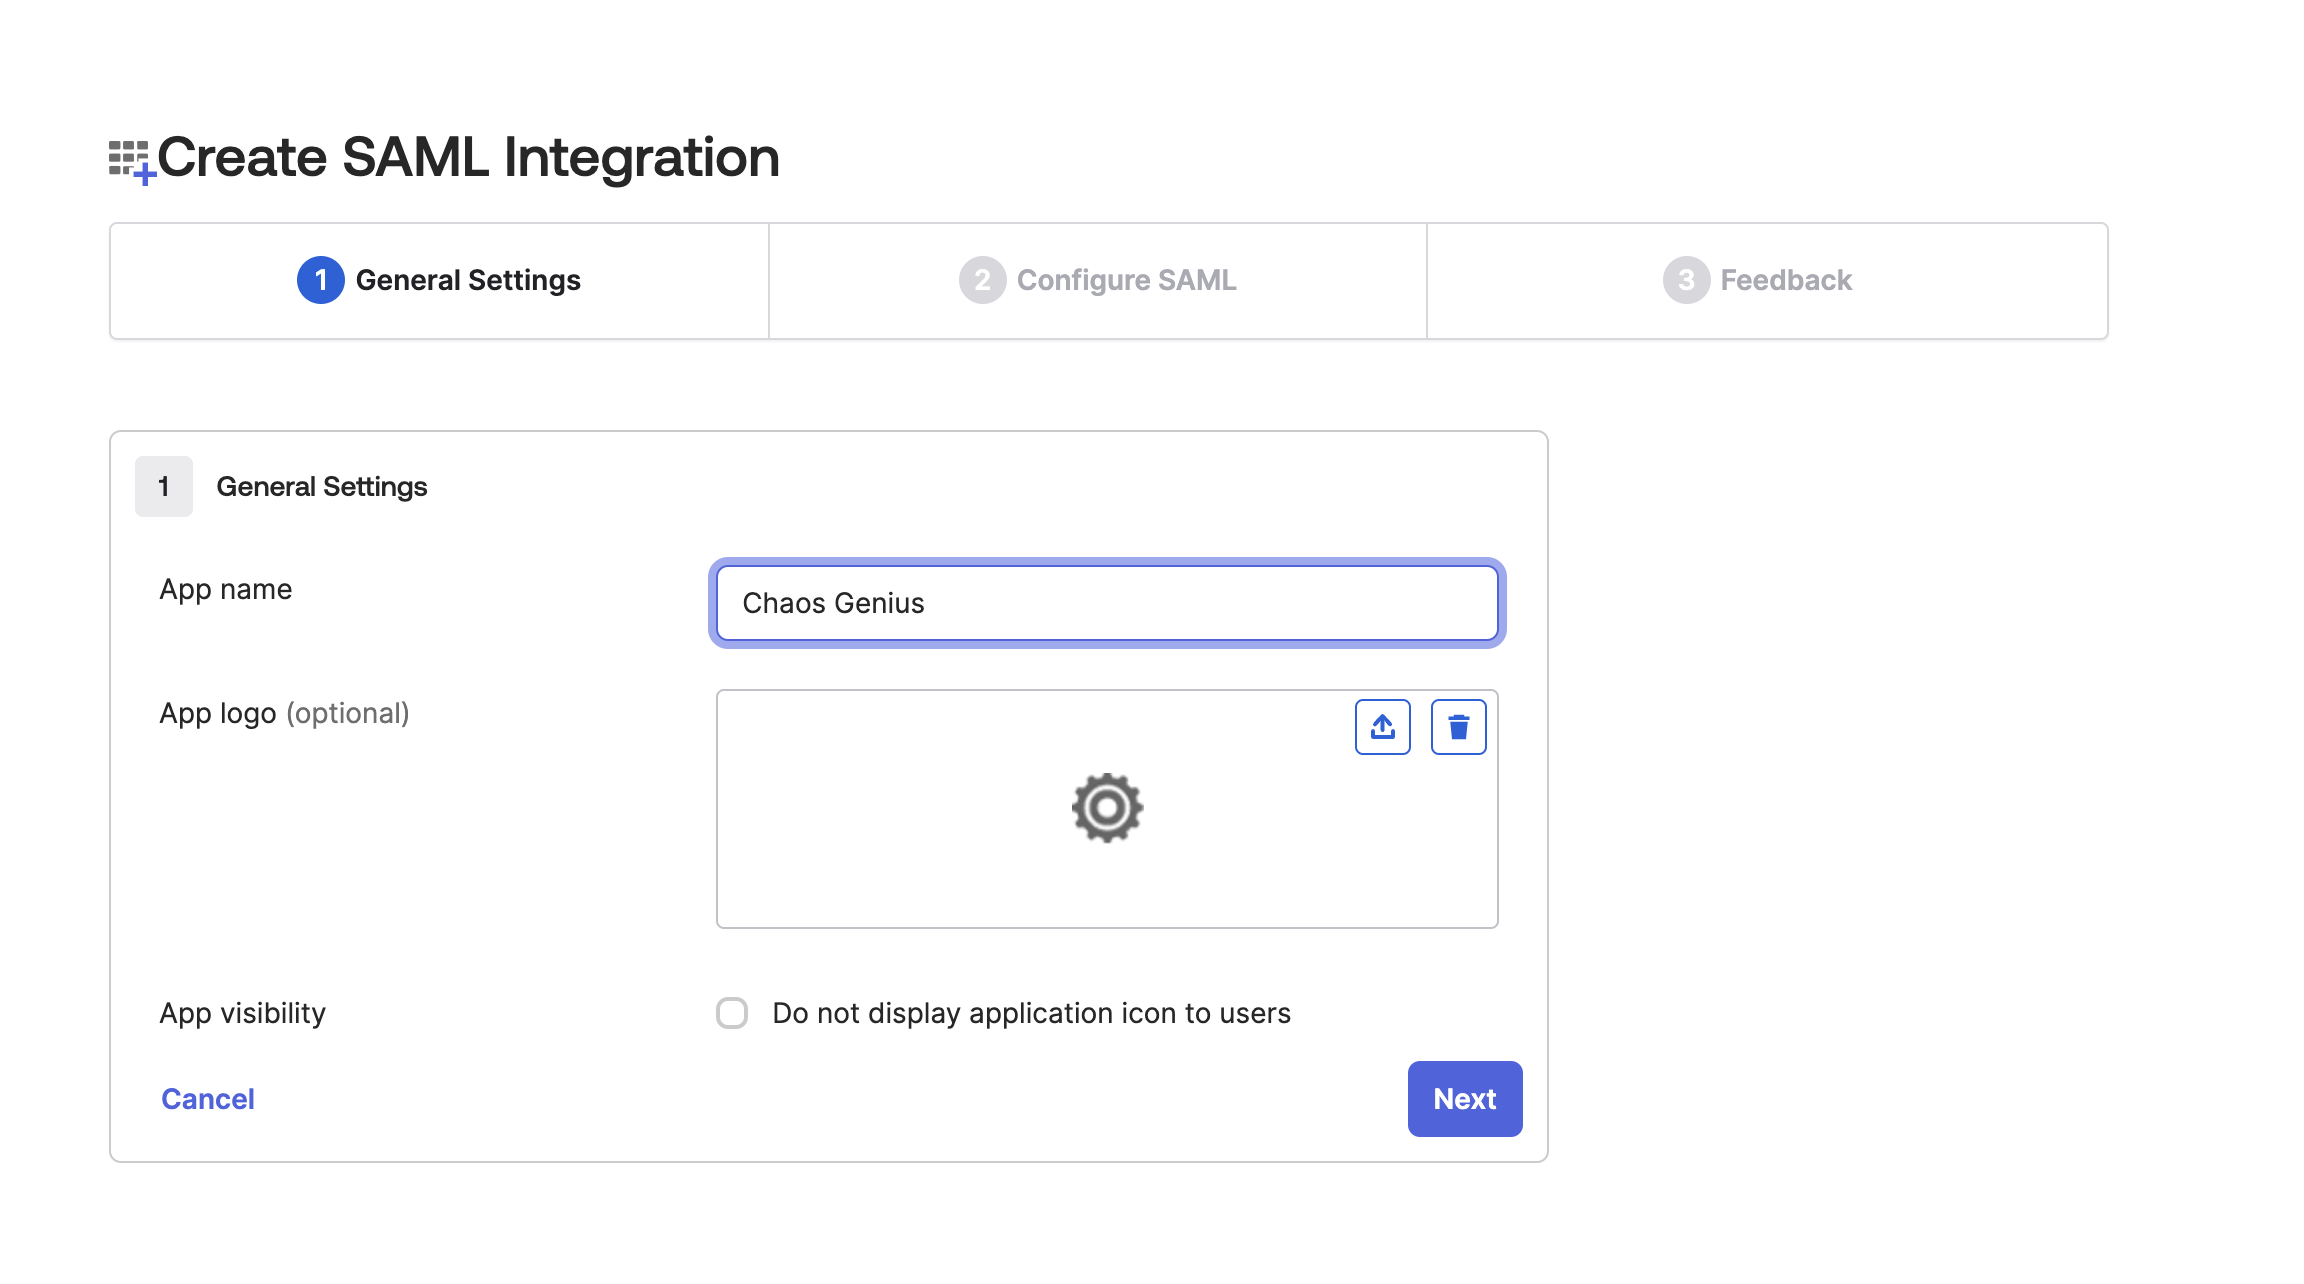
- Enter Chaos Genius as the application name or modify it as per your requirements, then click Next.
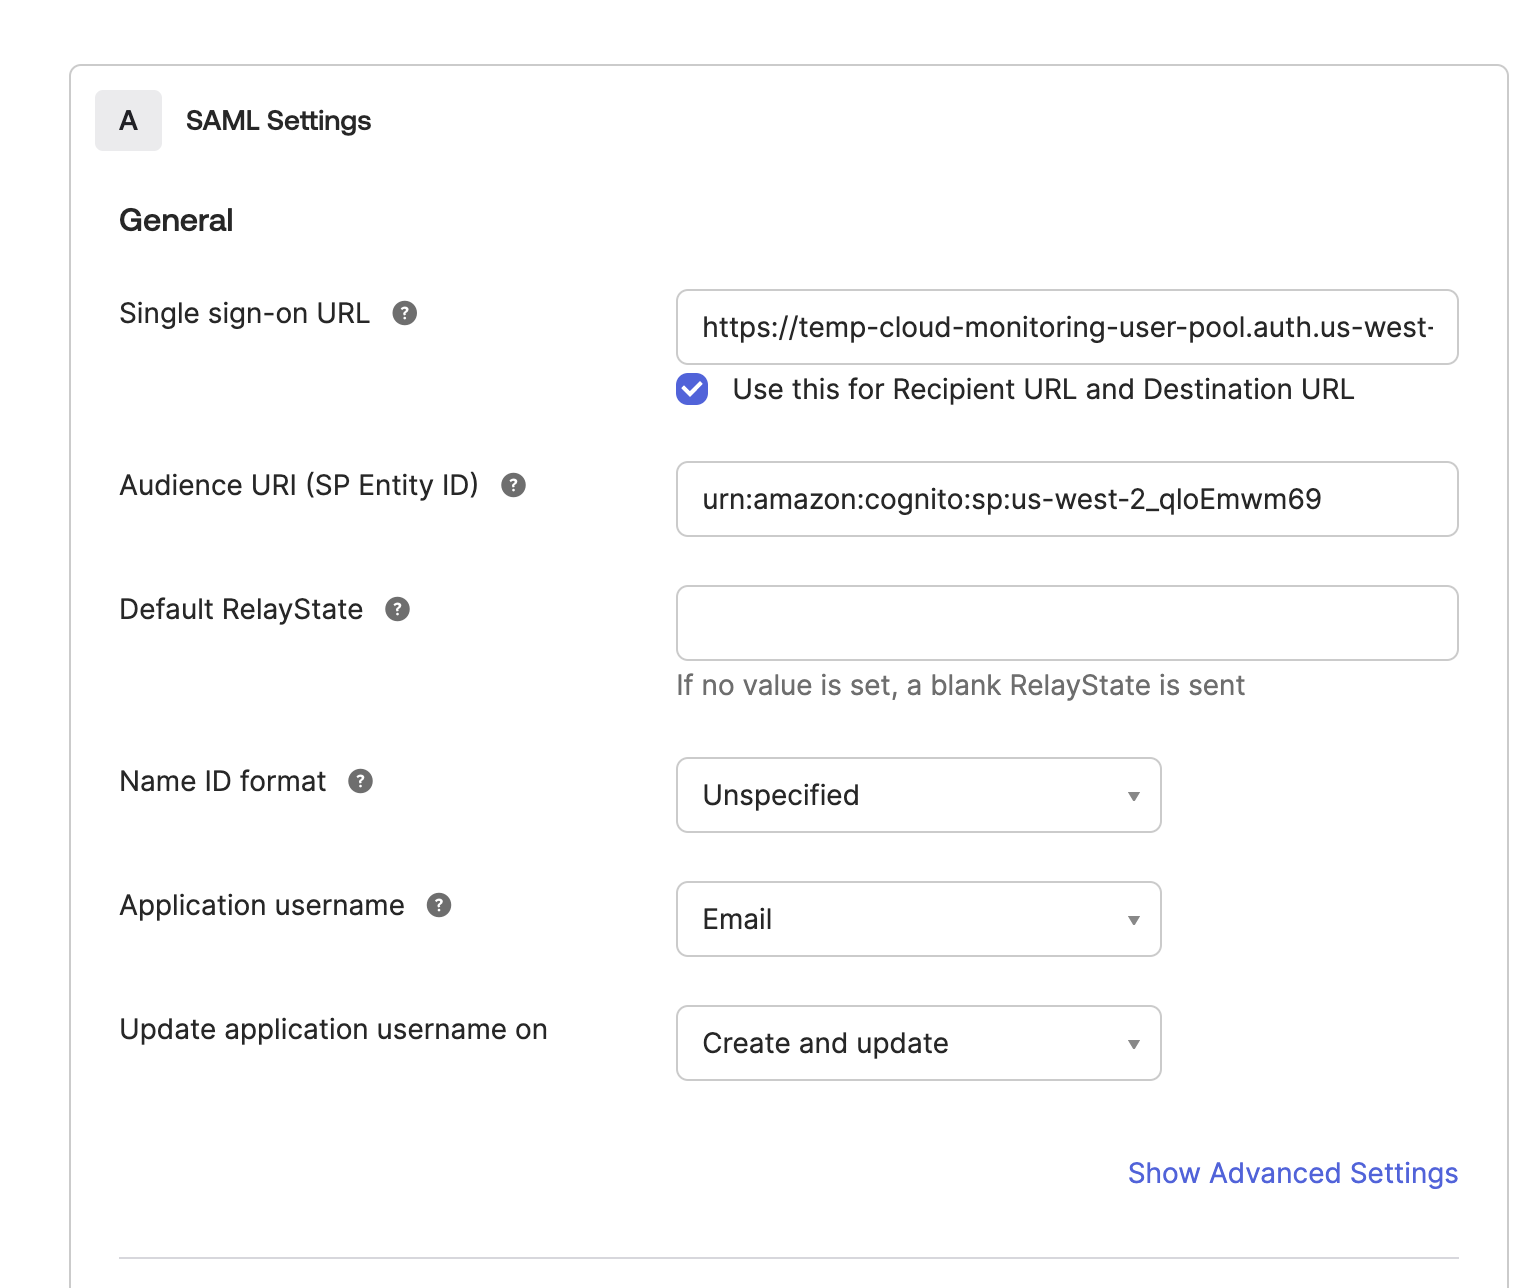
Step 3: Configure SSO Settings
- In the Single sign-on URL field, enter:
https://temp-cloud-monitoring-user-pool.auth.us-west-2.amazoncognito.com/saml2/idpresponse - In the Audience URI (SP Entity ID) field, enter
urn:amazon:cognito:sp:us-west-2_qloEmwm69 - Set the Application username to Email.
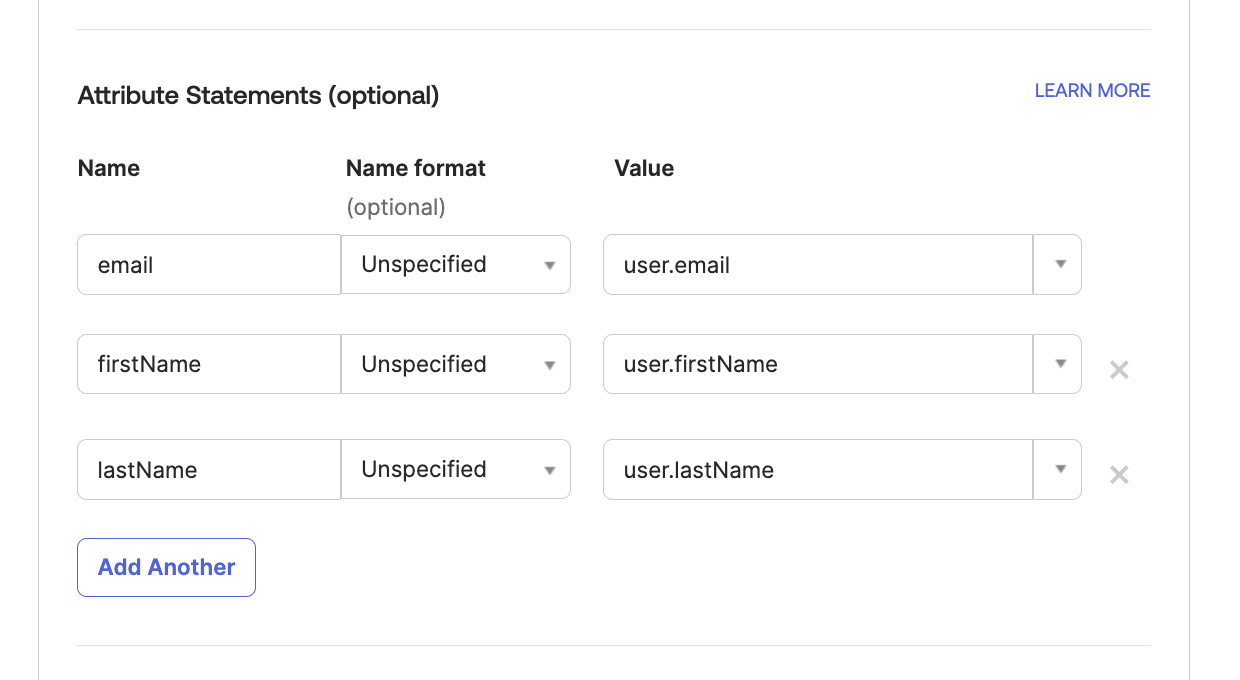
- Add the following attribute statemtents:
- email to user.email
- firstName to user.firstName
- lastName to user.lastName
- Then click Next.
- Click on Finish.
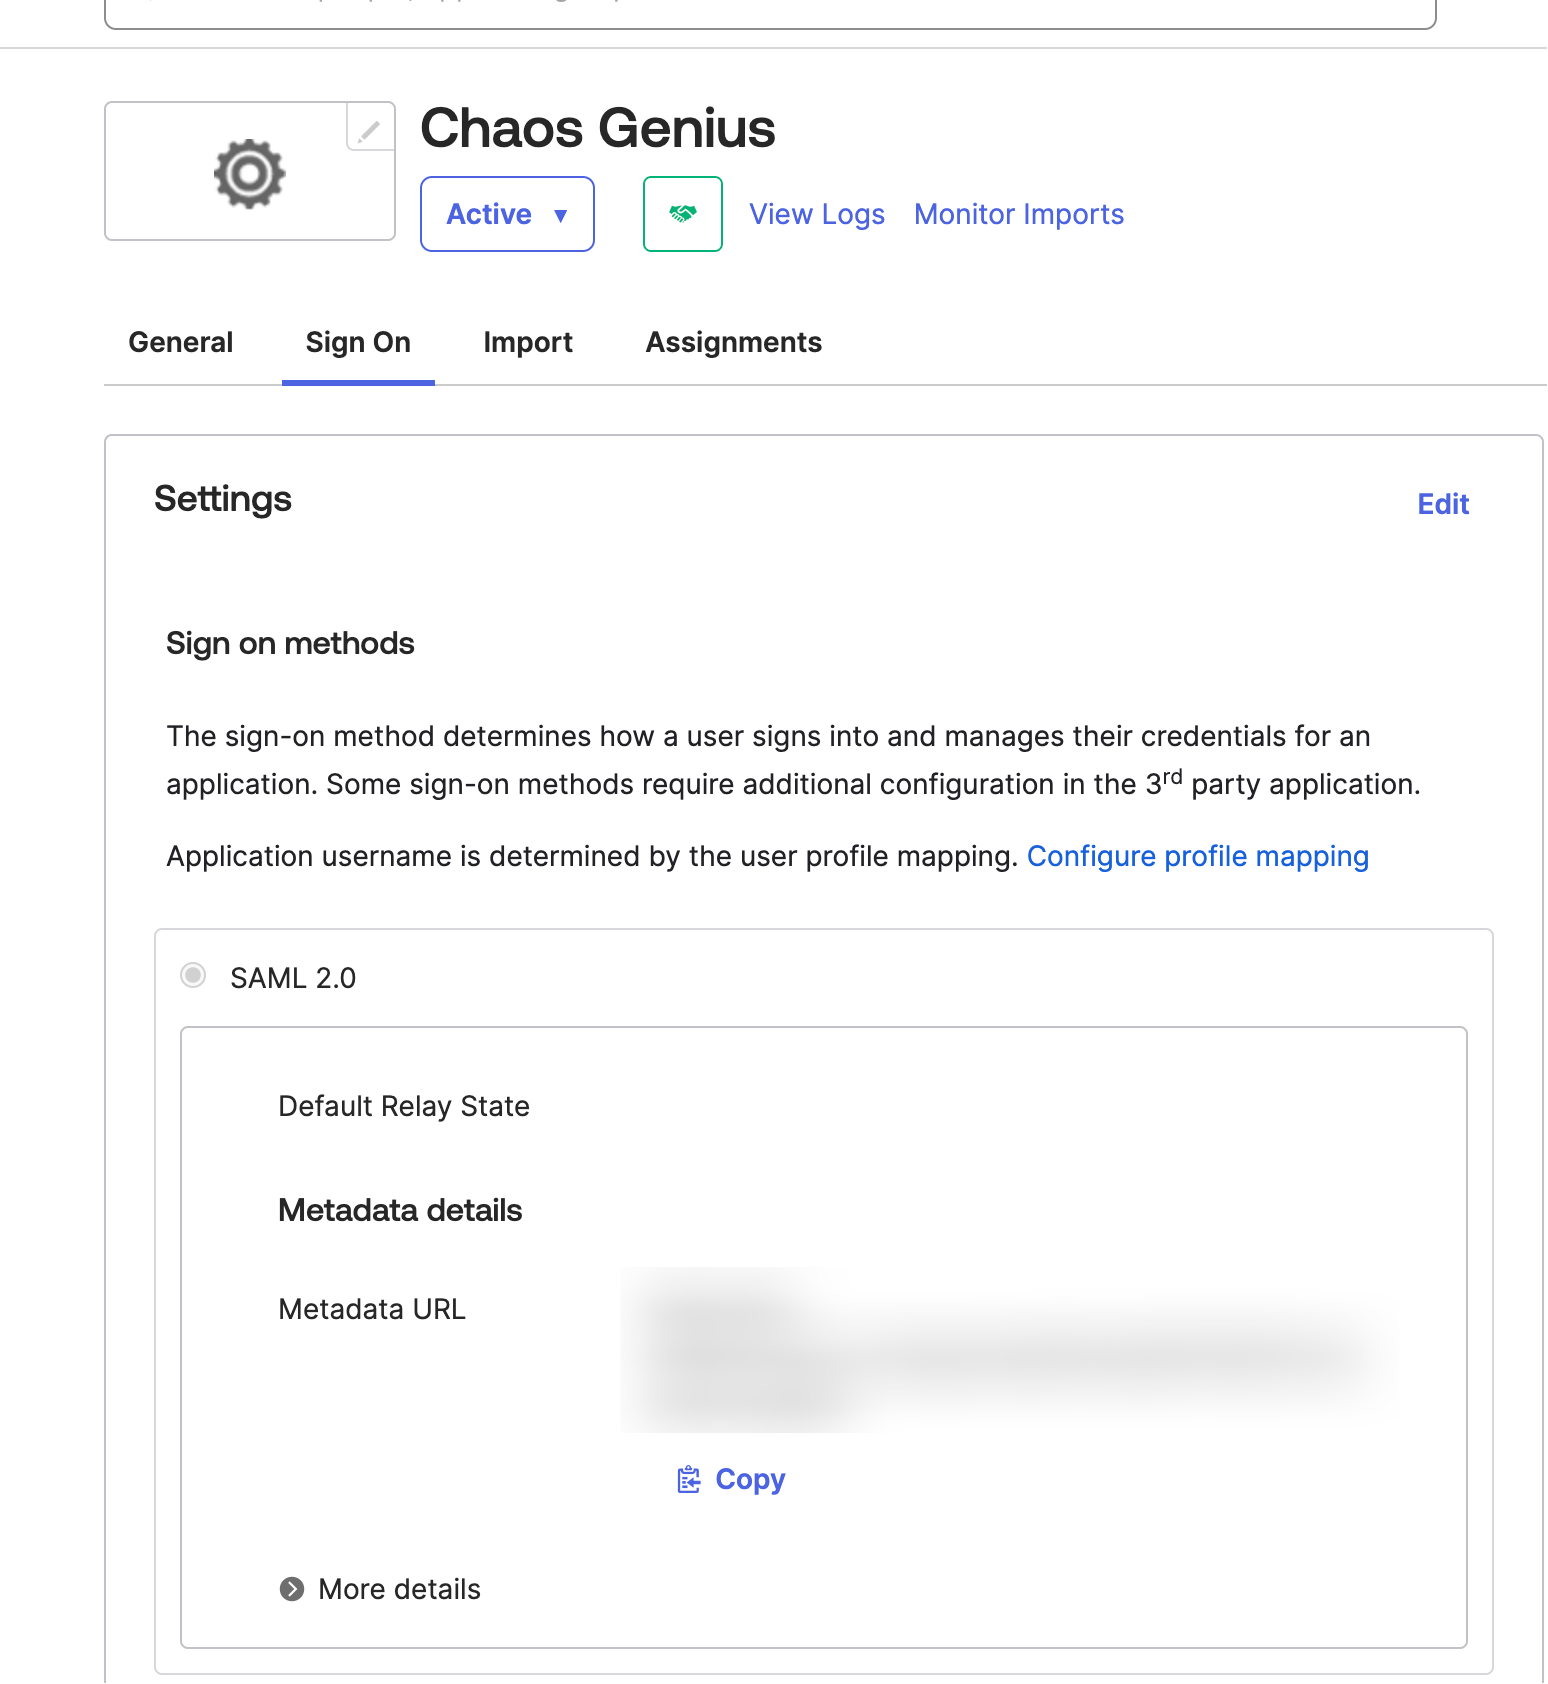
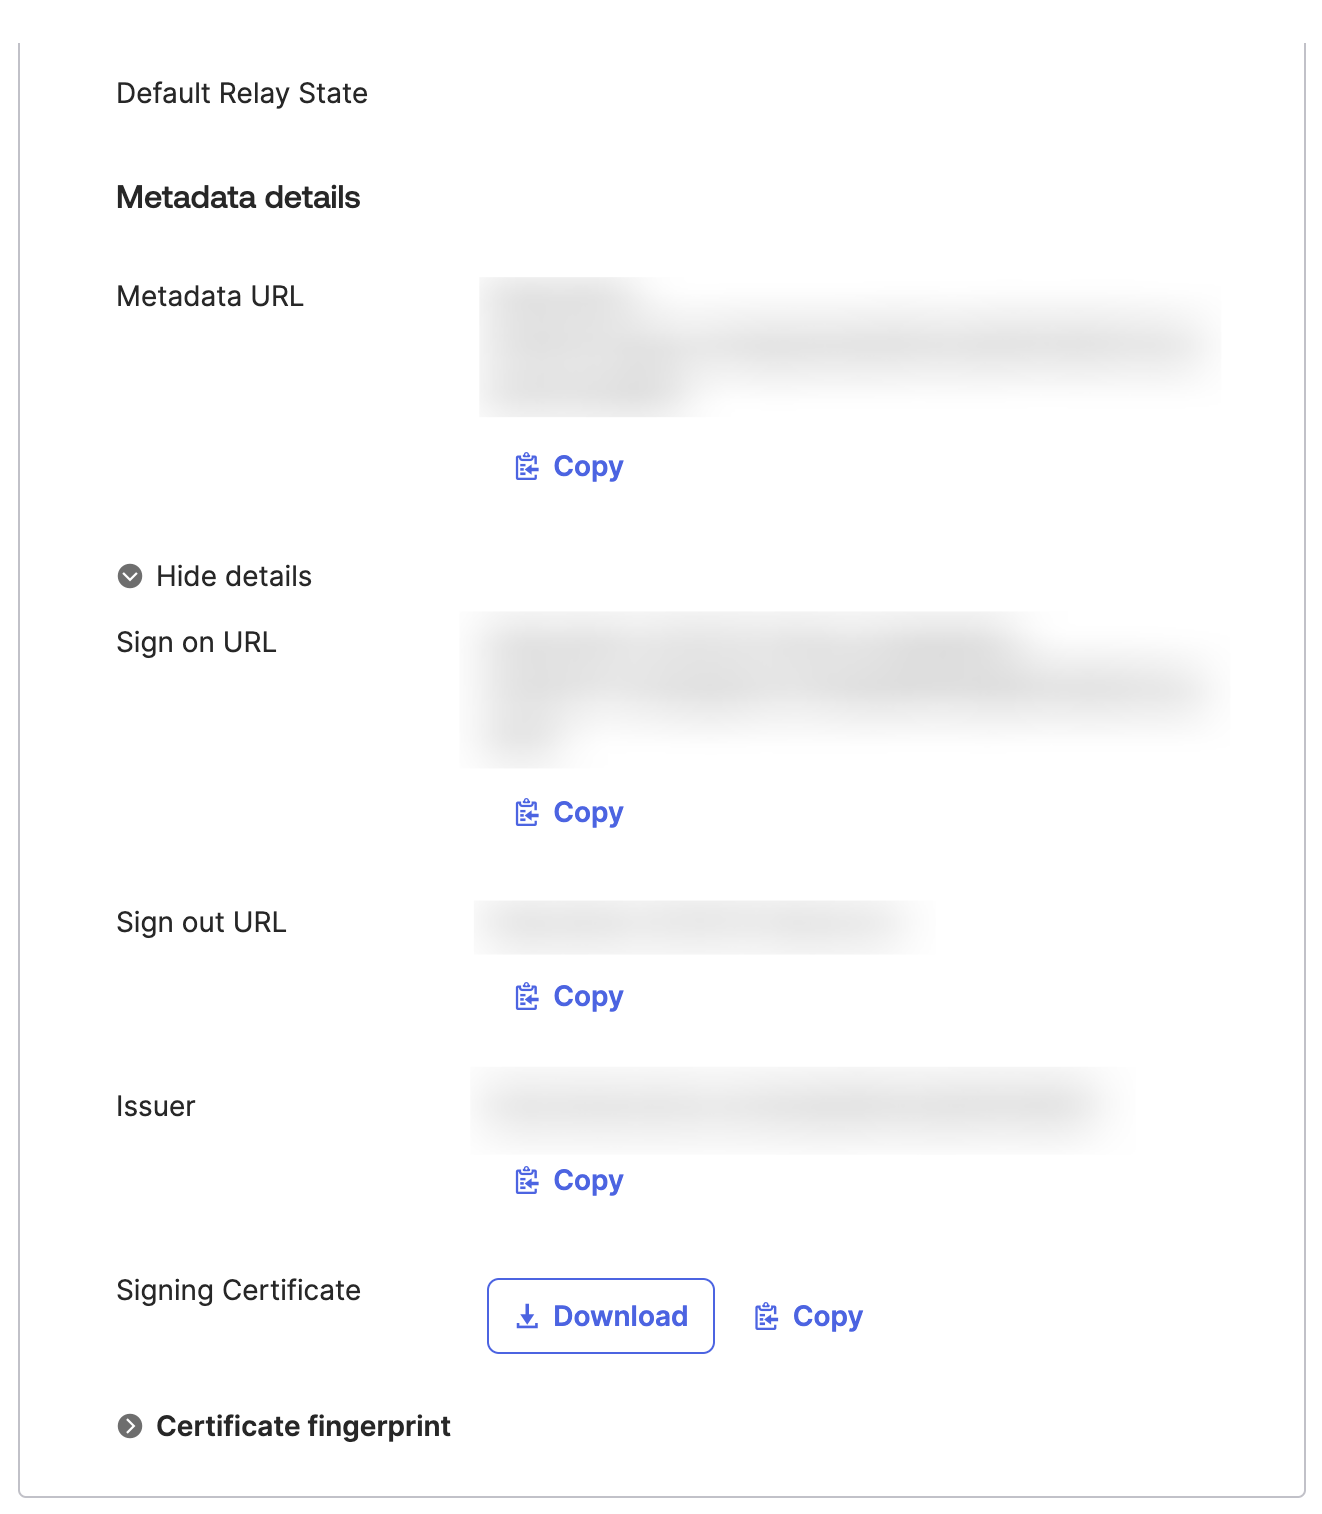
Step 4: Retrieve Metadata and Signing Certificate
- You will be redirected to the Apps Sign-On page. Copy the metadata URL displayed on this page.
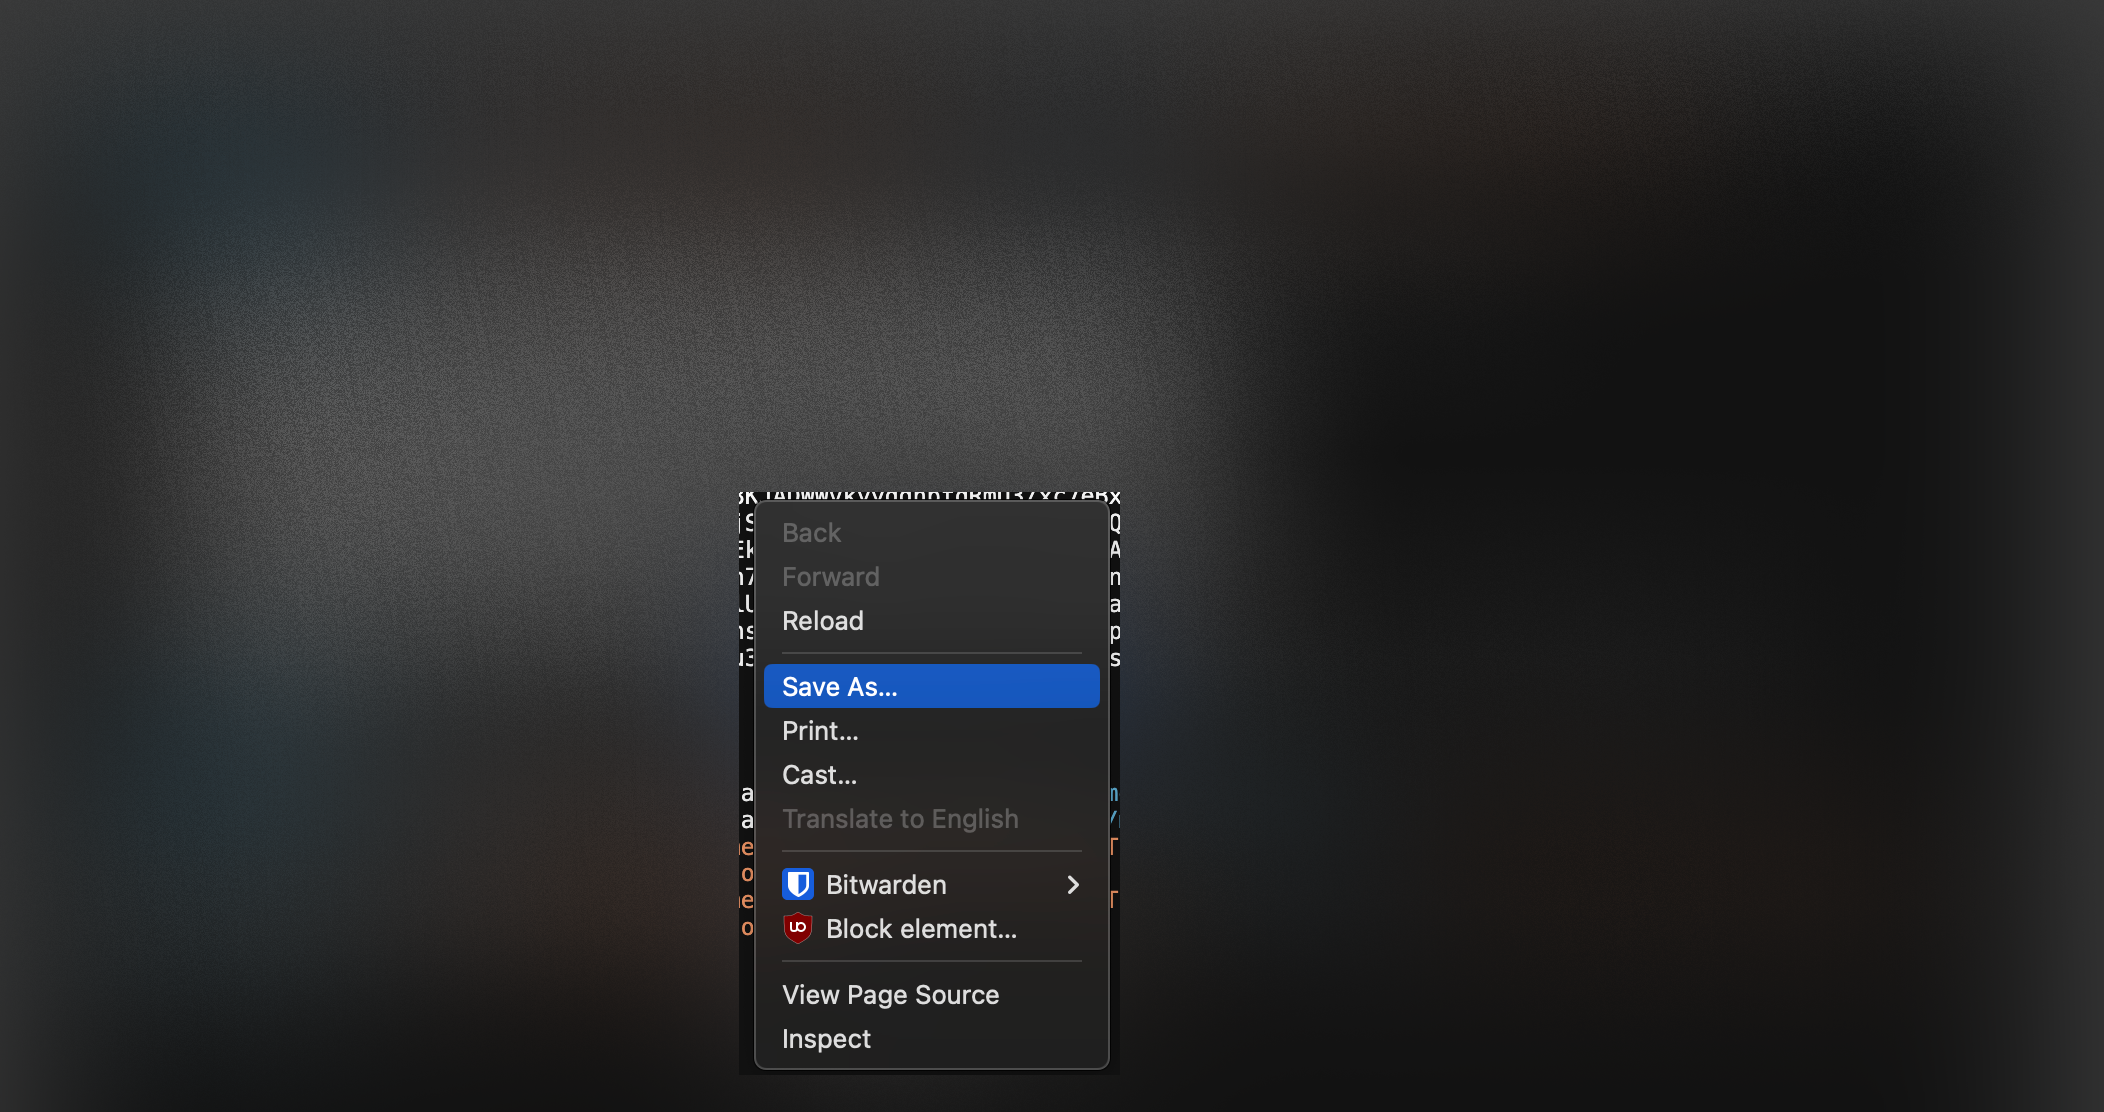
- Open this URL in a new tab, right-click on the page, and select Save As to download it as an XML file.
- On the same Sign-On page, under the metadata URL, click on More Details to download the signing certificate.
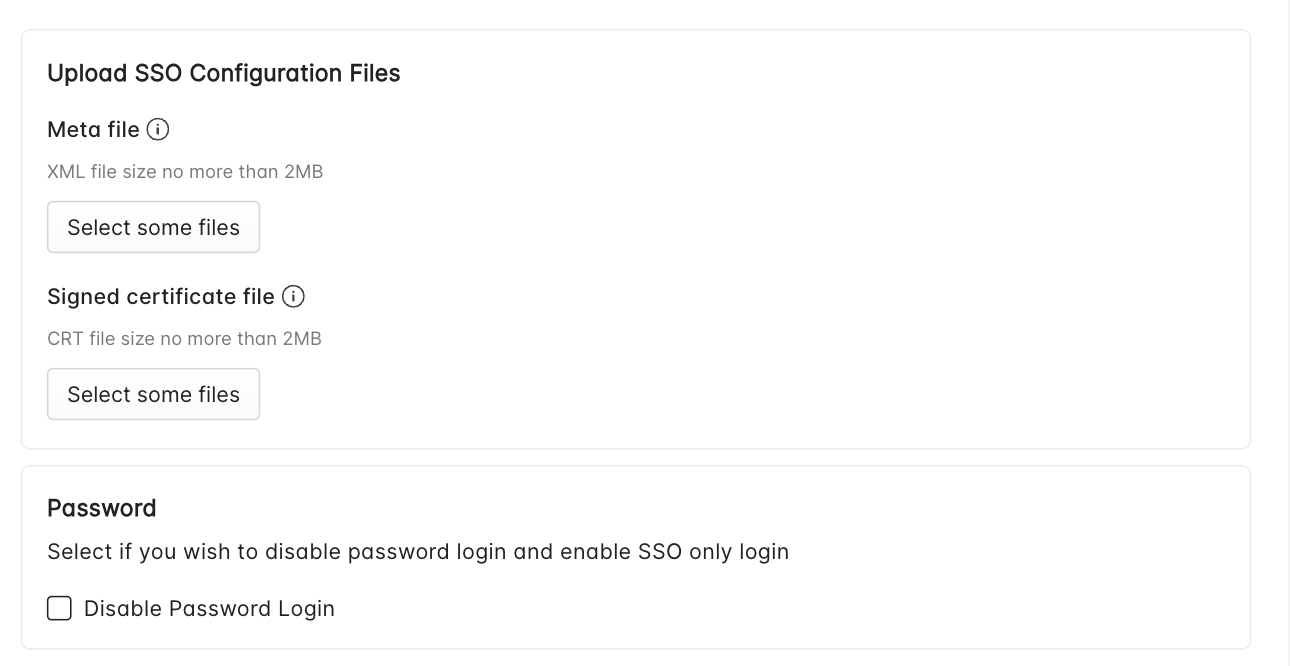
Step 5: Upload Files to Chaos Genius
- Now that you have both the Metadata and Signing Certificate files, provide these files to Chaos Genius.
- Upload the downloaded files into the SSO Configuration section of Chaos Genius settings and click on Enable SSO.